This year we have noticed an even larger movement towards nature and everything natural than ever before. We decided to embrace this trend with this gorgeous DIY table runner!
First, start with a long piece of burlap. This table runner can either run the length or width of your table. Determine which direction you would like it to run and then make sure your burlap is long and wide enough for your table. The burlap can be purchased at any craft store.
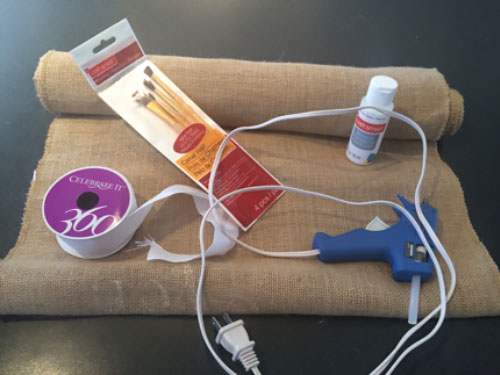
Other materials:
- Acrylic craft paint in any colour you of your choice. We picked white because it stands out against the burlap and matches our décor
- A fine brush, small enough to paint thin lines
- A glue gun
- Ribbon to affix to the edge, your choice of style and colour
- A pencil
- Scissors
Step One
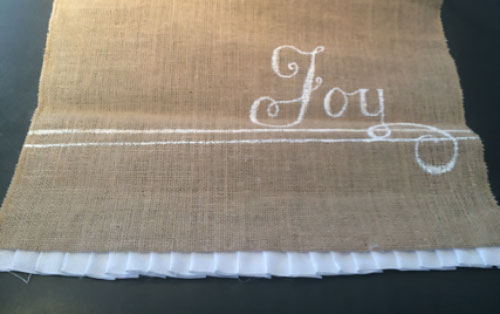
Spread the table runner and adjust it to the length and width needed by trimming it with craft or kitchen scissors. Then take a pencil and trace or stencil the lettering you would like to appear on your runner.

Next, with a lot of patience and a fine brush, begin to paint the letters on the burlap. We also added a thick line above a thin one across the width of the burlap.
Step Two
Once the lettering is done, wait for the paint to dry. Once dry, turn the runner over and fold the raw edges of the burlap back and use the glue gun to attach. This way, they are hidden underneath.
Once dry, set the ribbon where you would like to glue it down. We used ribbon that had wire in it because it holds the shape easier. We pleated the ribbon before gluing it to give it a more refined look.
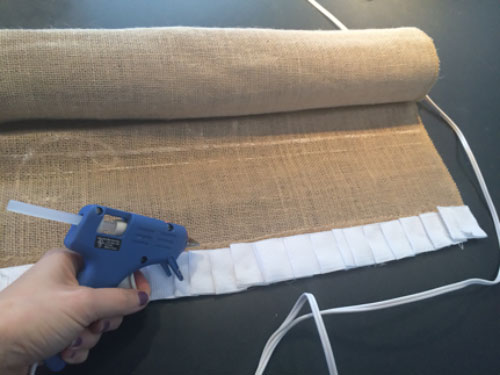
When you are happy with the placement of the ribbon, use your hot glue gun to attach it. Use the same treatment along the opposite edge of the runner so both edges are the same.
Step Three
Once the glue is dry along both edges of the runner turn it over and Voilà!! You have a finished product that all of your holiday company will love!!